
Throttle tube
Replaced the throttle tube today. Mine was broken from what I can only assume was a drop on the right side of the bike at some point. I keep finding more broken / bent things on the right side of the bike as I do maintenance. Even the old handlebars appear slightly bent.
Here is the old tube
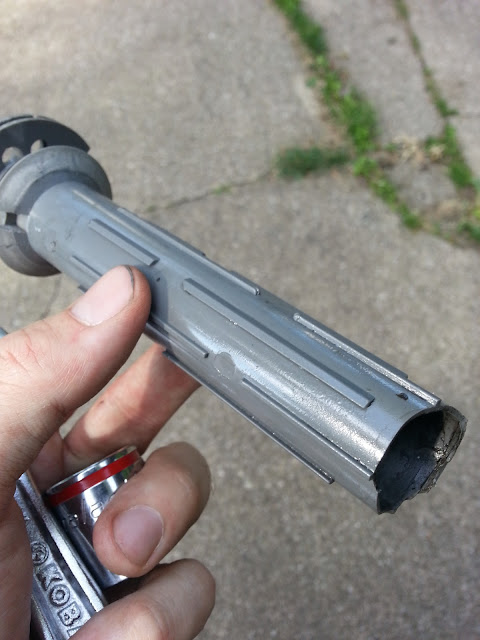
I replaced it with a throttle tube designed for Yamahas. Motion pro part number 01-0094. It fits perfectly, and actually eliminates an ugly gap that used to be on the end of the throttle near the controls.
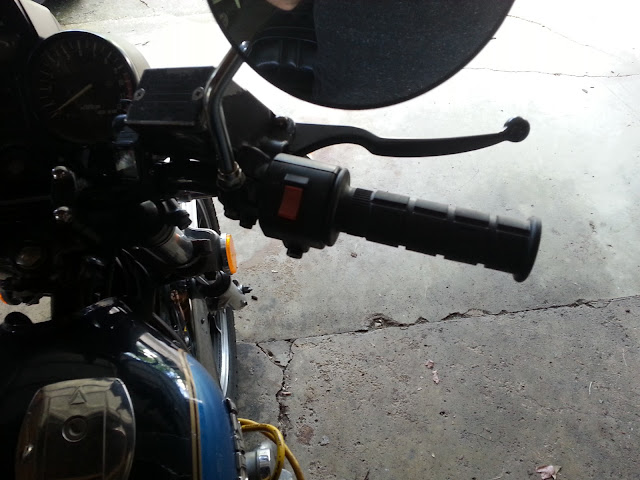
My understanding was that this throttle tube should have a larger diameter where the cable attaches, causing the twist of the throttle to be shortened to get to wide open. Supposed to be a 1/4 turn. So far it seems about the same as the old one, so I may have ordered the wrong part if that had been my goal. I wouldn’t have minded that change but I’m perfectly happy with the way it is. Next time I’m in the garage I’ll have to check how far it actually twists to get to wide open.
Handlebar swap, part 2
Got my new cables in the mail, and here are the results.
Throttle cable is about 7-7.5″ shorter. This is the motion pro one for a 82 GS550M. I installed it and it worked out great, if just a tad tight. For a minute I thought it might be too short but it worked out prefectly.

I also got a clutch cable, pictured in my previous post. This one was off an 83 GS650M. I was surprised to find that it was only about 3.5″ shorter than mine

I was a little bummed about this because I’m not sure if that’s enough to make a difference… I don’t think it will be able to follow the stock routing. So for now I am leaving the stock one on to see if I can deal with it. It’s OK but definitely rubs a bit when you route it to the right of the steering stem like I have it now.
For the choke, I used the stock one and re-routed it around the right side of the steering stem, through the right frame cover, and down. There’s still a bit of slack up front but it doesn’t affect functionality.
I tested the throttle through the full range of steering and couldn’t feel any issues.
The bike is down currently because I broke some exhaust bolts trying to get the old exhaust system off, but that’s another post entirely. So I have not yet been able to ride and test everything.
Handlebar Swap
I’ve finally gotten around to swapping the handle bars, which is something I’ve been meaning to get to for a long time. I’ve never been a fan of the stock handlebars on this bike, and many others who own the same “L” style GS bikes will agree. They have way too much pull back and leave your hands and wrists at an awkward angle. It makes for poor control of the motorcycle and made the riding position fairly uncomfortable.
Here is what they looked like originally


The replacements are BikeMaster Daytona bars, in black finish. About 20 bucks from most vendors.
The process was fairly simple. I just removed all of the controls, didn’t have to really detach any cables. The only trouble I had was getting the throttle tube out from the original grip. I had to cut the old grip off with an exacto blade. Now swapping the new bars and grips in…


Much better! The grips, if anyone is curious are Oury brand grips. Only about 10 bucks. The unfortunate side effect is that now I have to deal with cables that are too long. I have ordered a shorter throttle cable (from an 82 GS550M Katana) and a new choke cable because I discovered mine is broken.

The only really challenging one is going to be the clutch cable. I can’t seem to find a route for it where it doesn’t rub or bind up on me when I turn the bars. And unfortunately, there doesn’t seem to be a matching shorter one readily available from other models. It might have to end up being a custom cable from motion pro if I can’t find a route that works. For now I may be able to route it outside of the #1 carb (normally it goes between 1 and 2) to let the extra slack out to the left side of the carbs. That’s ugly though!
This picture illustrates the problem quite well:

Notice how the brake hose also comes off the master cylinder at a weird bend. I will probably be upgrading that to a shorter stainless steel line anyways, but it’s workable for now. I’ll post again when it’s finished!
Side cover restoration – almost done!
Since my last post I have applied the chrome paint, and done some sanding / polishing. I was not too aggressive with the sanding since this was my first go at it but I still noticed a pretty incredible improvement in the finish when done. I may go at it again but for now I’m very happy with it. My process was:
- Wet sand 1000 grit
- Wet sand 1500 grit
- Wet sand 2000 grit
- Apply polish with microfiber applicator / buff with cloth. Took a few rounds of this.
I used this polish:

As for the chrome – it did not turn out as I hoped. Maybe the wrong primer? I want to reapply something but I have no idea what to use now. This was duplicolor all purpose chrome and it has just kind of been rubbing off with even just minor handling and turning a dull silver. It will pass for now but eventually I want to apply something else – maybe something I can brush on??
Anyways, here are some pics of the before and after. I may still apply some pinstriping tape. Got some gold pinstripe tape from the auto store but just read that it is not intended for curves. Straight line only. So I’ll have to see what I can do with it or maybe get another kind.
No adhesive on these badges yet, they’re just propped on there for picture time. I also want to get some in natural sunlight but have not had the opportunity yet because I live in Ohio (grumble).


Anyways – I hope I have done justice to these. I loved the original paint scheme but they were soooo beat up. Thinking they look better than when I started! Next is the finishing touches and putting them back where they belong.
Some proper photos
Here are some pictures of my motorcycle on a nice sunny day. I realized I didn’t really have any GOOD pictures of just the bike. So here it is, in all of its rusty glory!


Side cover restoration – Day 5
I Applied the clear coat the other night. Here it is without having been polished yet. Shiny!! This is about 48 hrs of cure time.

I’ve been reading about techniques for polishing these. Will gladly accept any tips – I’d love to give them at least a light sanding and polish to enhance the depth a bit more. This metallic blue sure is pretty.
Next up is getting the chrome pieces (currently with blue tape on them) painted. And maybe some pinstripes. I plan to wait a few more days for the clear coat to cure since I’m going to have to tape it up to do the next part. Then it will be time to apply badges and put them on the bike!
Side cover restoration – Day 4
Decided to go for it yesterday. With the help of my buddy Jim (who brought some sandpaper and clear coat over – thanks Jim!), I got the side covers sanded to the point where any imperfections are barely noticeable. They were not perfect, but a heck of a lot better than where they were before I started.
Here’s the left one:

Put the top coat down, took about 4 coats. The paint I used was Duplicolor Dark Metallic Blue, originally a GM color I believe. It’s definitely that 80’s metallic blue I was looking for, even if it doesn’t match the tank perfectly. I really love the way it turned out!


I decided to throw one on the bike out of curiosity. Needless to say – it doesn’t really match that well, which I’m a little bummed about, but I think once the chrome part is painted (currently taped) and the badge is on it should blend in nicely. If it doesn’t I suppose applying a decal might help, or I’ll just have to paint the tank to match 

Today or tomorrow (weather permitting) I am going to apply the chrome paint to the accent piece and then clear coat.
Fuel valve and gas tank bolts
In between rounds of waiting for paint and bondo to dry, I decided to take care of a couple of things that were bugging me. First on the list was the fuel valve.The fuel valves on these bikes are vacuum operated and prone to getting gunked up over the years. I suspect mine was still the OEM valve.
Here it is on the left side of the tank, disconnected from the fuel and vacuum lines. I could barely turn mine between the ON, PRI, and RES positions by hand. Almost needed pliers.

Now here it is removed, next to the new one:

Nothing is noticeably broken so I may take it apart and try to restore it, that way I can either sell it or just keep it around as a spare. Here’s the shiny new one installed.

While I had the tank off I decided to reattach it properly. Below is a comparison of what it was attached with (the two screws / bolts on the right), and what it SHOULD be attached with (on the left), and picture of everything mounted.


Needless to say – these needed replaced.
Side cover restoration – Day 3
Continuing to prime, glaze, sand, repeat. Left side cover is ready to go, right side is still in progress. It’s very close.

After priming this, still needs love.

Glazed the rough spots again and sanded:

Looking better!

To be continued…
Restoring the side covers – Day 2.5
A little more work tonight. Spent about an hour sanding things down, and it’s still holding strong. Reinforcing the backs with additional JB weld helped a lot. I also picked up a tube of Bondo Glazing Putty on the recommendation of a forum member on thegsresources.com and it has been GREAT for filling in all the little imperfections on the larger surfaces.
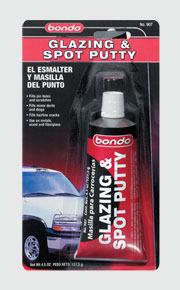

In the picture you’re seeing where I sanded all the edges to blend them in. After the red glazing putty sets I will sand that smooth and should have a nice uniform surface to work with. Then it’s just a little more elbow grease, spot filling, and finally a REAL prime coat.
One thing that helped a lot was having the initial primer coat on there. Makes it really easy to see where you have and have not yet sanded, which allowed me to attack the edges very systematically. No missed spots!

